After placing Getintent pixels on advertiser's site/newsletter (for more details JS pixels placing specification and Non-JS pixels placing specification (mailing, etc.)) create and configure retargeting segments in the Getintent interface.
1. Go to «Segment definitions» tab and click "Create new segmenta new segment":

 2.
2.
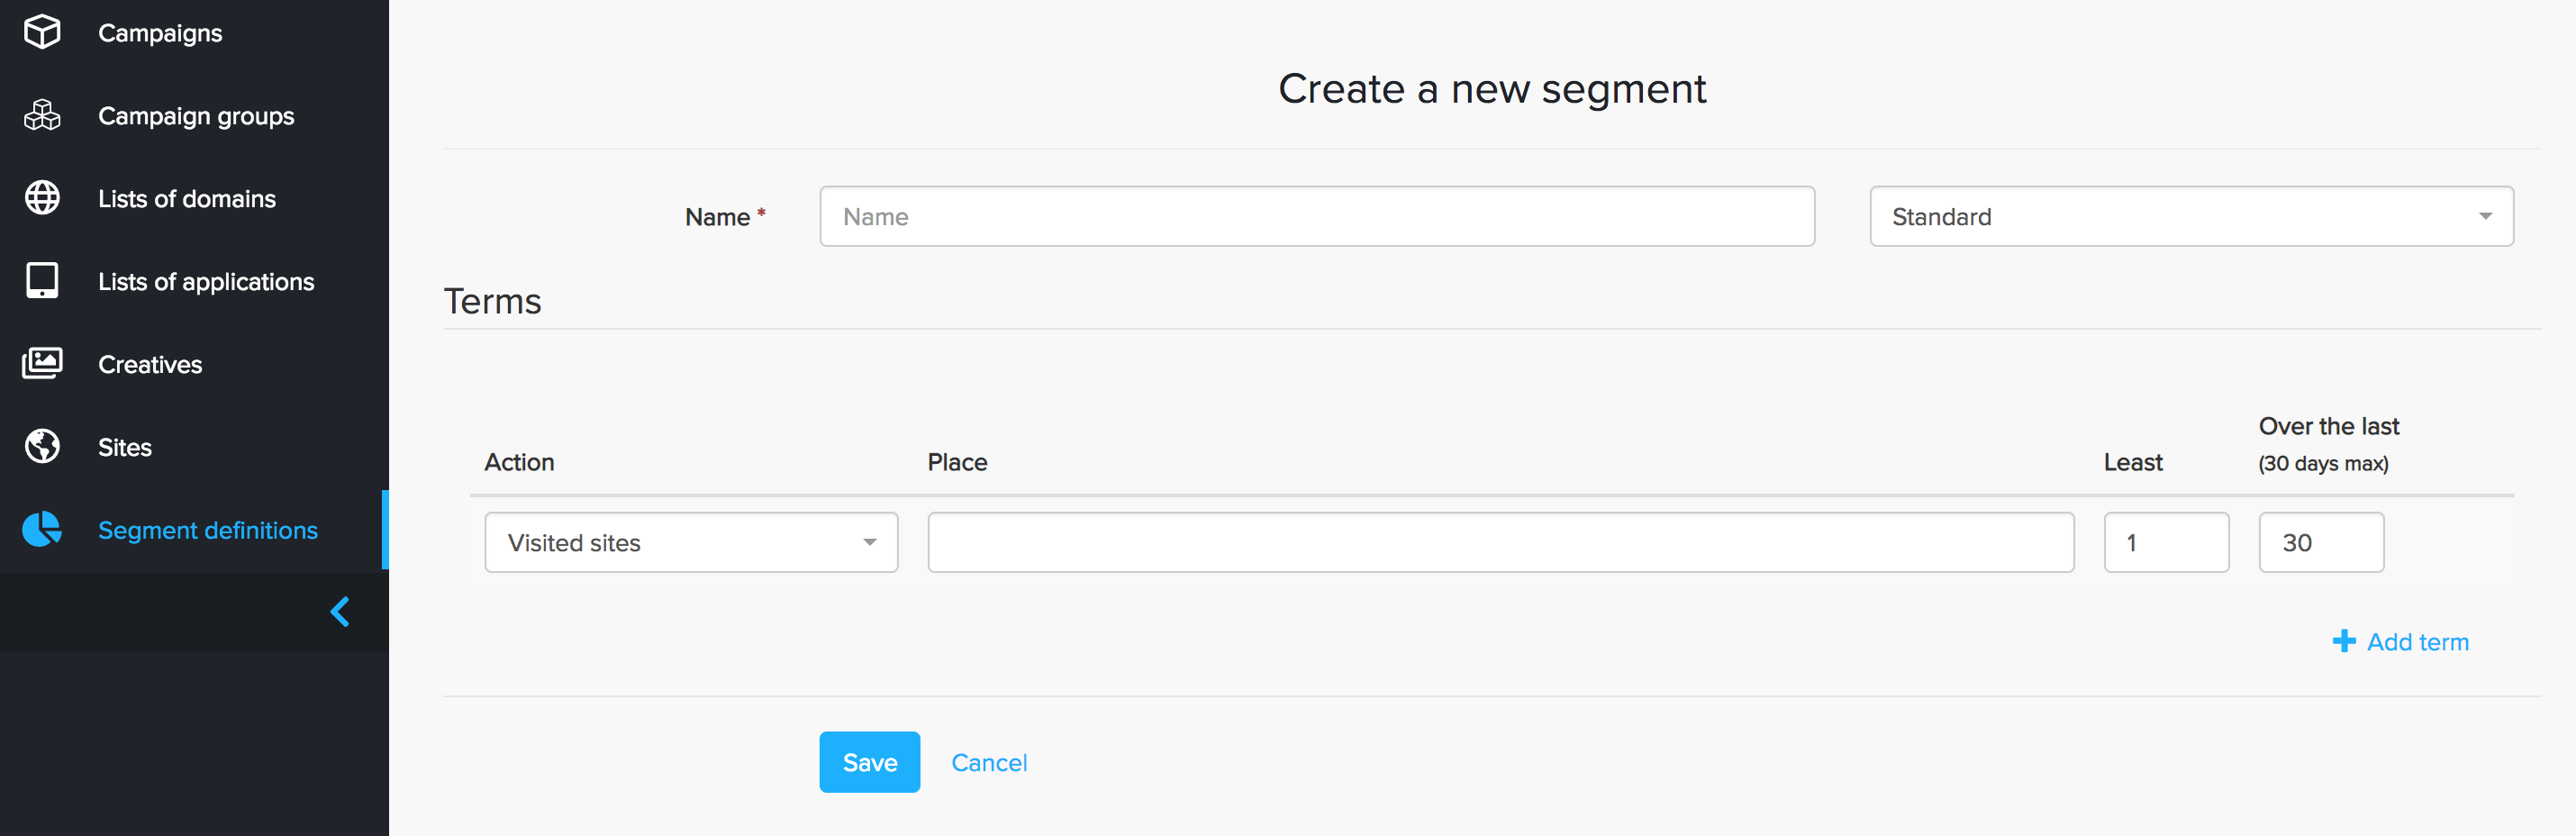
Create a new segment:
Name : name – name a new segmnent segment (use the Latin alphabet)
Terms – in this section you can add different rules for segments.Checkbox "Negative" - when you activate this checkbox it activates an excluding logic for this rule.
Action – select the rule for users tagging (for all the actions functioning install all three types of pixels on the site).
Least – in this field you can specify the number of repetitions of the selected action
Over Over the last – in this field you can specify the number of days in the previous period, which will be counted for the selected action (we recommend to use not more than maximum 30 days can be used).
An example of a customized segment rule: a user who visited the site, but didn’t make a purchase.
...
Segments with multiple terms
Each Getintent segment (aka Segment Definitions) can be created based on multiple triggers. The trigger creation field is called "term" and consists of three sub-fields "Action", "Place", "Least" and "Over the last".
| Примечание |
|---|
The field "Place" means the location (URL, Campaign or Creative ID, etc. ) chosen for the particular "Action". Please note that using URL parameters (utm_source etc.) is allowed, but may significantly narrow the segment candidates search. |
Currently, the triggers are:
- Visited sites
- From search
- Visited URL
- Saw pixel
- Visited categories
- Add to cart
The rules for putting multiple triggers:
- for the triggers of different type → intersection (AND), i.e. both conditions are applied simultaneously
| Примечание |
|---|
I.e one should put rules as separate actions in the UI, by clicking |

- for terms of the same type → association (OR), i.e. at least one of the terms should be applied.
| Примечание |
|---|
All the triggers should be placed inside one "Place" field, each on a separate line |
Then click the “Save” button.
Segment is added and can be used in in Campaign Settings.
After pixel has been successfully installed and segments have been created the volume can be seen (a statistics updates the day after creating a segment) in the "Segments" tab.